
If you’re a developer creating any type of software, be it an app, an API, or simply a library, the first step is always to set up a development environment. A local development environment creates a dedicated space on your computer where you write, run, test, and debug code before deploying it to production. As a developer, I’ve often struggled with setting up my development environment. I’ve wasted hours chasing missing packages and dealing with misconfigurations. A few months ago, I spent several hours fixing my setup because it wasn’t working for some teammates. It turned out they were on macOS while I had configured everything on Windows.
Recently, I started using an MCP server to automate the process, and it saved 3–4 hours of setup work and spared me the frustration of misconfigurations.
The easiest way to set up a local development environment is with an AI assistant like Desktop Commander — describe your project’s requirements in plain English and it installs dependencies, configures services, and sets up your environment automatically.
So, in this article, I wanted to share my preferred approach and workflow. But before that, let’s first briefly discuss the importance of setting up a local development environment properly, different ways to set it up, and their challenges.
Why Set Up Local Development Environment?
A local development environment is essentially a dedicated space on your computer where you write, run, test, and debug code before deploying it to production. It basically supports the frameworks, services, libraries, and dependencies your app needs to run. This way, you can build and test the software locally before deploying, so it doesn’t affect live systems or other team members.
In other words, without a development environment, you can’t run and test your code before production to see if it works the way you intend it to.
When you set up your environment for your project, it typically includes:
- A runtime, such as Node.js, Python, Ruby, or Java, depending on your project
- Databases, such as PostgreSQL or MongoDB
- Tools and CLI dependencies
- Configuration, which includes environment variables, ports, and local config files
- Other required services, such as local web servers
Having a properly configured dev environment setup allows us to code faster, iterate quickly, catch bugs early, reduce deployment errors, and experiment without risk. For instance, with a local dev environment, you can easily test new features and adjust configurations locally without affecting production or shared environments.
Different Ways to Set Up a Dev Environment
Over the years, I have tried various ways to set up local development environment and even virtual development environments. While some methods are better than others, it usually depends on your project requirements.
Common methods to set up a dev environment include:
Manual Setup and Package Managers
Manual installation of frameworks, libraries, and packages is one of the obvious ways to set up your dev environment. It involves installing and configuring everything by yourself, such as downloading binaries, adjusting environment variables, and setting up dependencies one by one.
For example, you can manually install Node.js, configure environment variables, and set up databases. Many developers also use package managers.
Different operating systems and programming languages have their package managers. For instance, you can use Homebrew on macOS to install tools and services with simple commands. Similarly, on Linux, apt, yum, or pacman handle package installation quite efficiently.
Then we have npm and yarn to manage JavaScript dependencies in Node.js ecosystems. Similarly, Python has pip for package management.
Developers who opt for manual installation adopt this approach because it lets them see exactly what's happening at each step. But we can’t deny that it’s highly vulnerable to human errors. I’ll discuss more about this in the next section on challenges in setting up a dev environment.
Containerization and Docker
When you use Docker to set up local development environment, you run your development environment inside containers instead of installing everything directly on your host system. It makes things easier by creating isolated, reproducible environments. For example, you can have a Node.js container for your backend, a PostgreSQL container for your database, and a Redis container for caching.
You define your entire application stack, including the operating system, programming language, databases, services, and all dependencies in a docker-compose.yml file. This makes version management easier. And you can also share your configuration with others, so your program doesn’t break on their system.
If you’re new to Docker, you may find learning it a bit challenging. However, there are tools that can automate this process and make using Docker simpler. I’ll discuss it later in the article.
Using an MCP Server
MCP servers have come into the picture recently after Anthropic introduced the model context protocol in November last year. You can now find an MCP server for almost any popular developer tool or platform.
But what do MCP servers do? They automate tasks; you can simply explain the task to an LLM like Claude in natural language, and the LLM will automatically execute it for you using the relevant MCP server. You don’t have to do the technical stuff manually.
I use various MCP servers in my development workflow, including Desktop Commander. The Desktop Commander MCP server helps automate my development environment setup. I’ll discuss how I use it in my workflow in a later section.
Install Desktop Commander MCP
Connect Claude to your local files and terminal. One-click install for Claude Desktop.
Why Local Dev Environment Setup is Still a Struggle?
Setting up a dev environment can be tricky. There are many things that can go wrong and eat hours of your time. Common issues include dependency hell, version mismatch, and platform inconsistencies. All of these can be really frustrating and slow you down significantly.
Let’s briefly discuss these common challenges and why they occur.
Dependency Hell and Version Mismatch
When your project requires too many external libraries or dependencies, installing the correct versions of all packages can be pretty challenging. The dependencies often conflict with one another, and it becomes so difficult or sometimes nearly impossible to satisfy all requirements simultaneously. That's when dependency hell occurs.
Also, sometimes, different components in the same project require different versions of the same dependency. On top of that, those versions can be incompatible with each other. This causes a version mismatch.
And one wrong version means hours of troubleshooting. The package manager or the dependency management system won’t be able to resolve wrong versions. The result? You get broken builds, conflicts, runtime failures, bugs, and errors.
Complex Configuration
Different projects can have different configuration requirements for databases, API keys, environment variables, and services. Managing these configurations is not only tedious but also prone to human errors; it’s not easy to remember so many configuration details and get them right for each project.
Platform Inconsistencies
As a developer, I find platform inconsistencies to be one of the most frustrating issues. You set up your dev environment, develop a feature, and it works perfectly fine on your OS. But when you send it to your team, it suddenly breaks on some systems. Why? Because you were using a different OS, say Windows, and some of your team members were on Linux or macOS; the configurations that work on your system aren’t working on theirs.
Learning CLI Commands
As developers, we already often work on complex coding tasks, and then on top of that, we have to remember dozens of shell commands or scripts just to set up our dev environment. This is obviously time-consuming, and we also sometimes end up making syntax errors.
Why I Prefer Automated Dev Environment Setup with an MCP Server
In my experience, if my dev environment is set up correctly without much manual troubleshooting, working on the project itself becomes a lot easier and quicker.
When I used Desktop Commander to automate dev environment setup, it actually saved me a lot of time and effort that I could invest in building the actual app or program.
So, how does the Desktop Commander MCP server work? You need to have Claude Desktop and Node.js version >18.00 installed on your system. You can then integrate Desktop Commander with Claude, using any of these methods:
Bash Install for Mac:
curl -fsSL https://raw.githubusercontent.com/wonderwhy-er/DesktopCommanderMCP/refs/heads/main/install.sh | bashNPX Install for Mac and Windows:
npx @wonderwhy-er/desktop-commander@latest setupIf you want to explore other ways to install the server, you can check out the official documentation.
Once the server is connected to Claude, you can see it in the ‘Search and tools’ section:
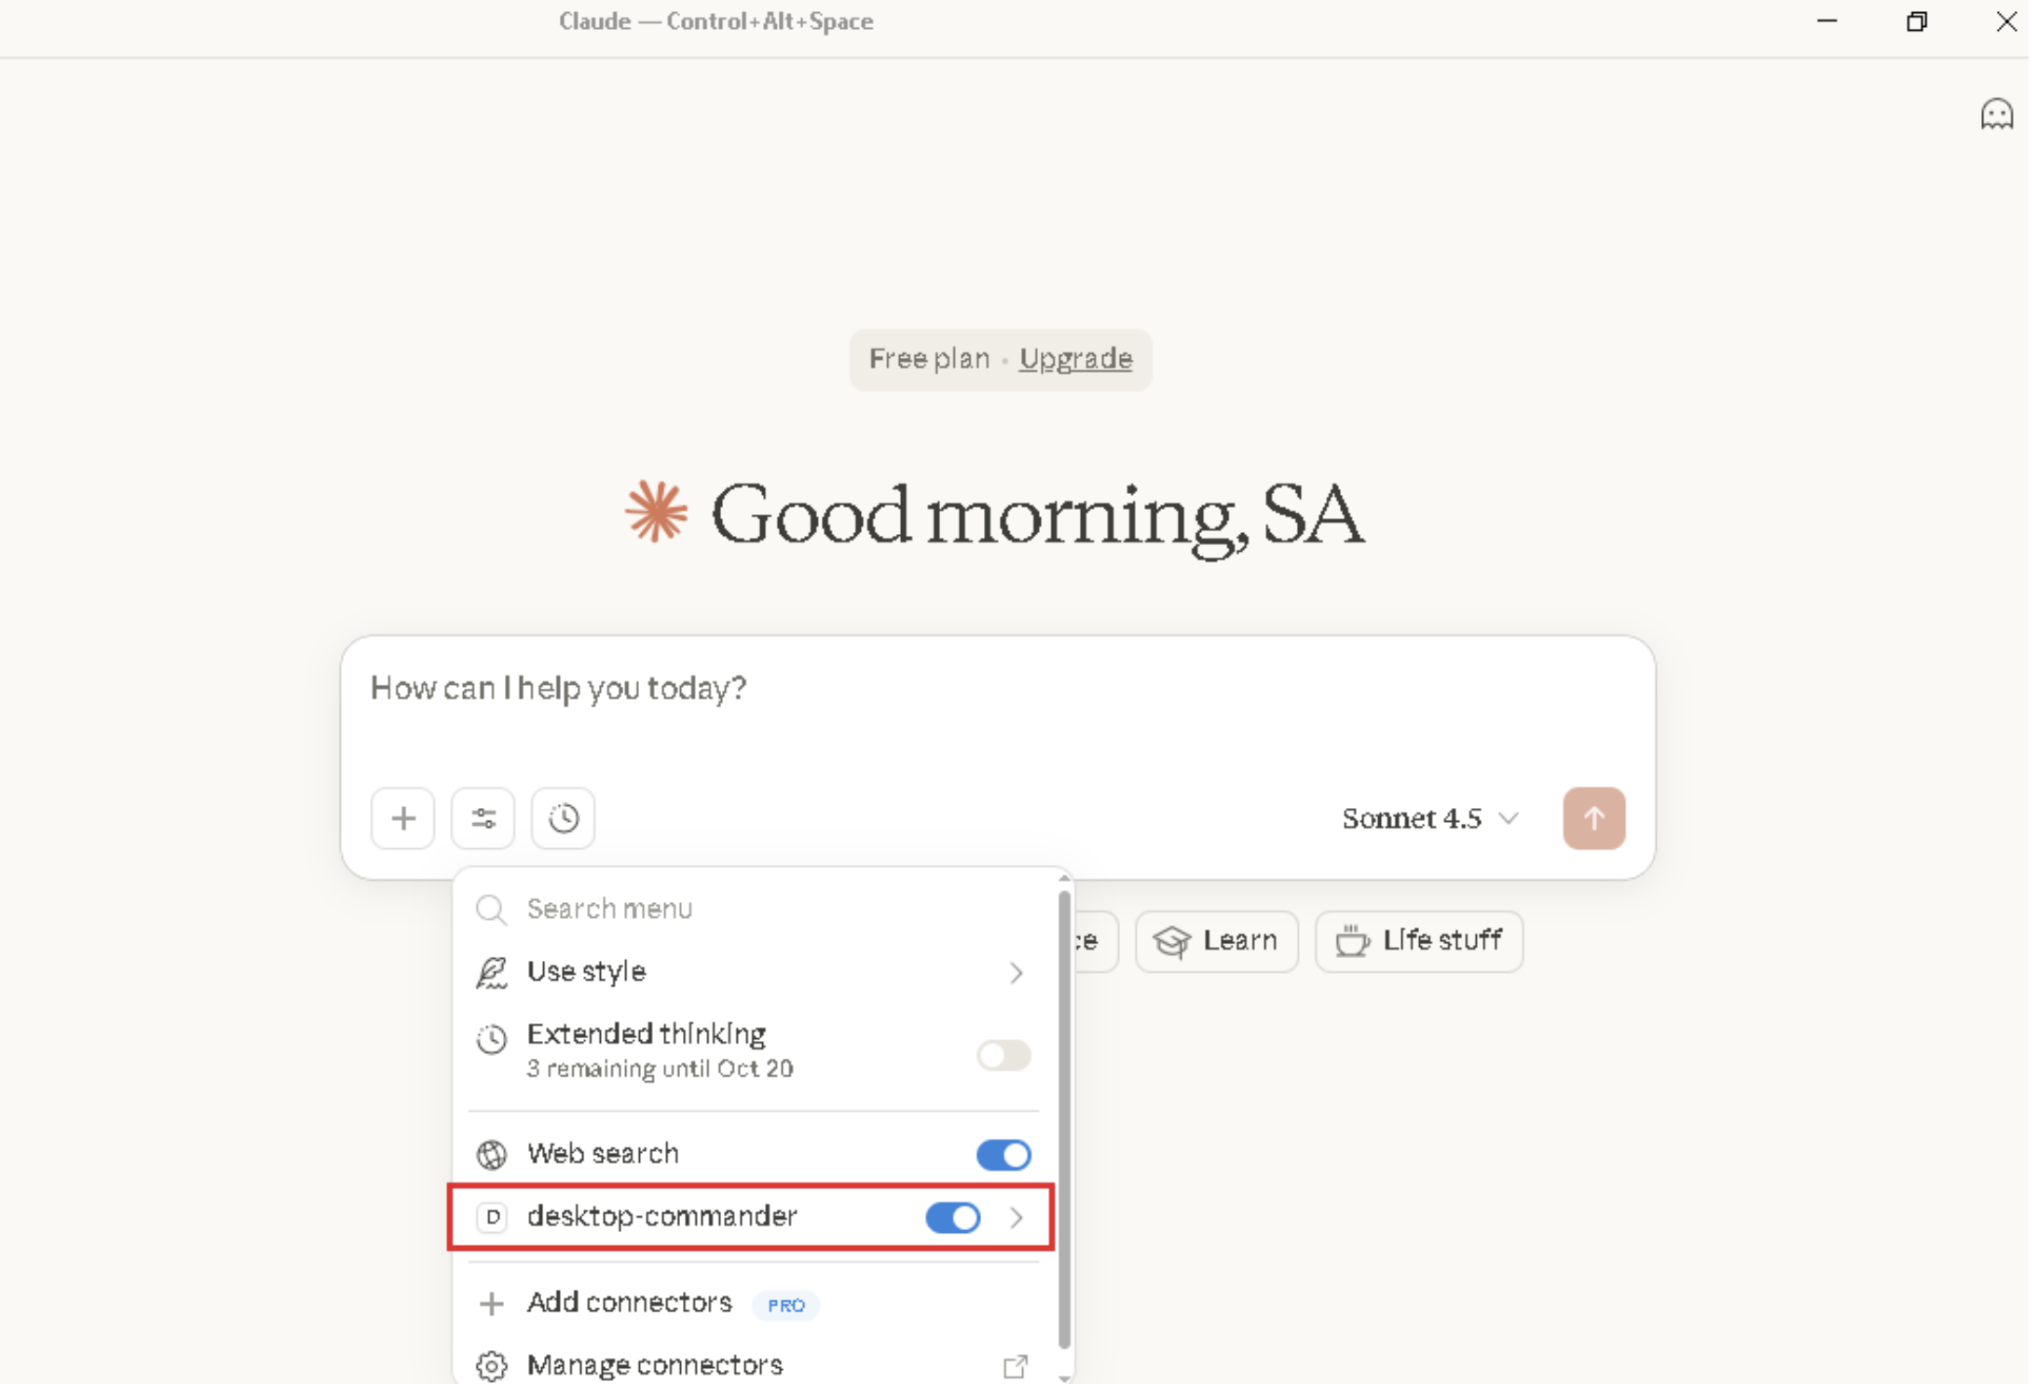
You can then use this server to set up a complete local development environment with a simple natural language prompt. You don’t have to manually install dependencies, create scripts, or manage versions. The MCP server is designed to handle everything automatically, from setting up servers and configuring systems to orchestrating processes.
Here’s an overview of some of the key tasks you can perform using the Desktop Commander MCP:
- Run shell commands (with streaming output, background tasks, timeouts)
- Manage processes (list, kill)
- Perform file operations (read, write, rename, search)
- Edit code files (diff-based patching)
- Automate multi-step tasks
For example, I can simply tell Claude: "Set up a full-stack Next.js app with Prisma, PostgreSQL running in Docker, and Tailwind CSS."
Claude will then ask for my permission to use the desktop-commander MCP server for setup:
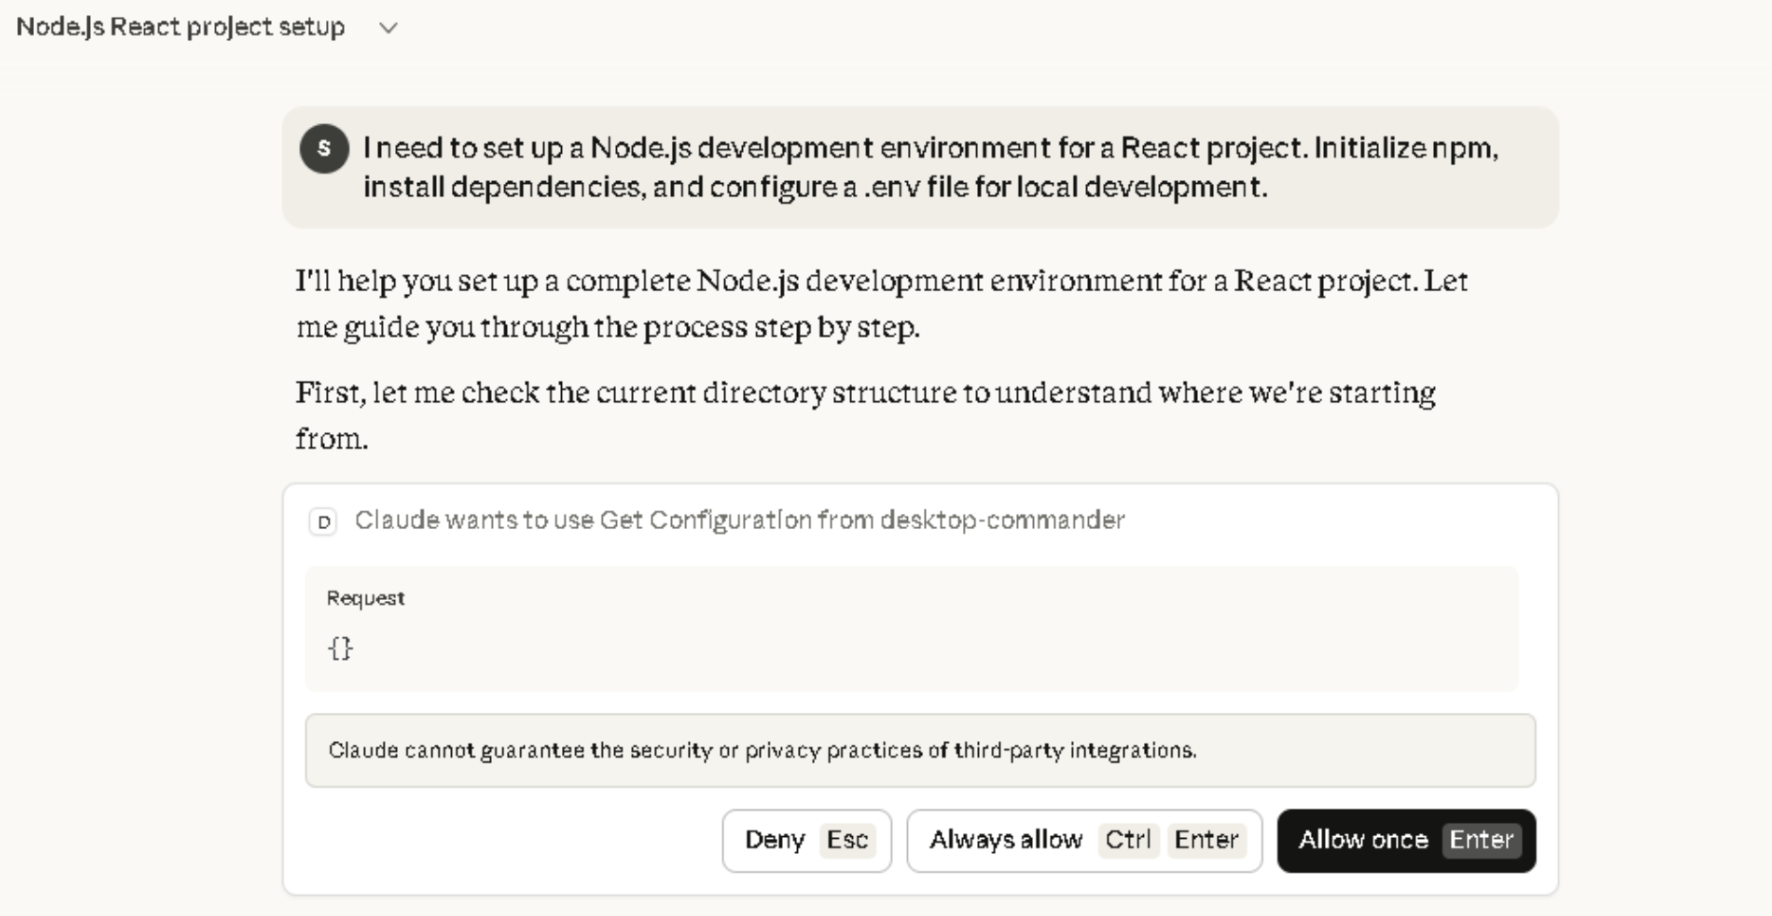
Claude will then automatically execute commands to create the project structure, install all necessary packages, and configure environment variables:
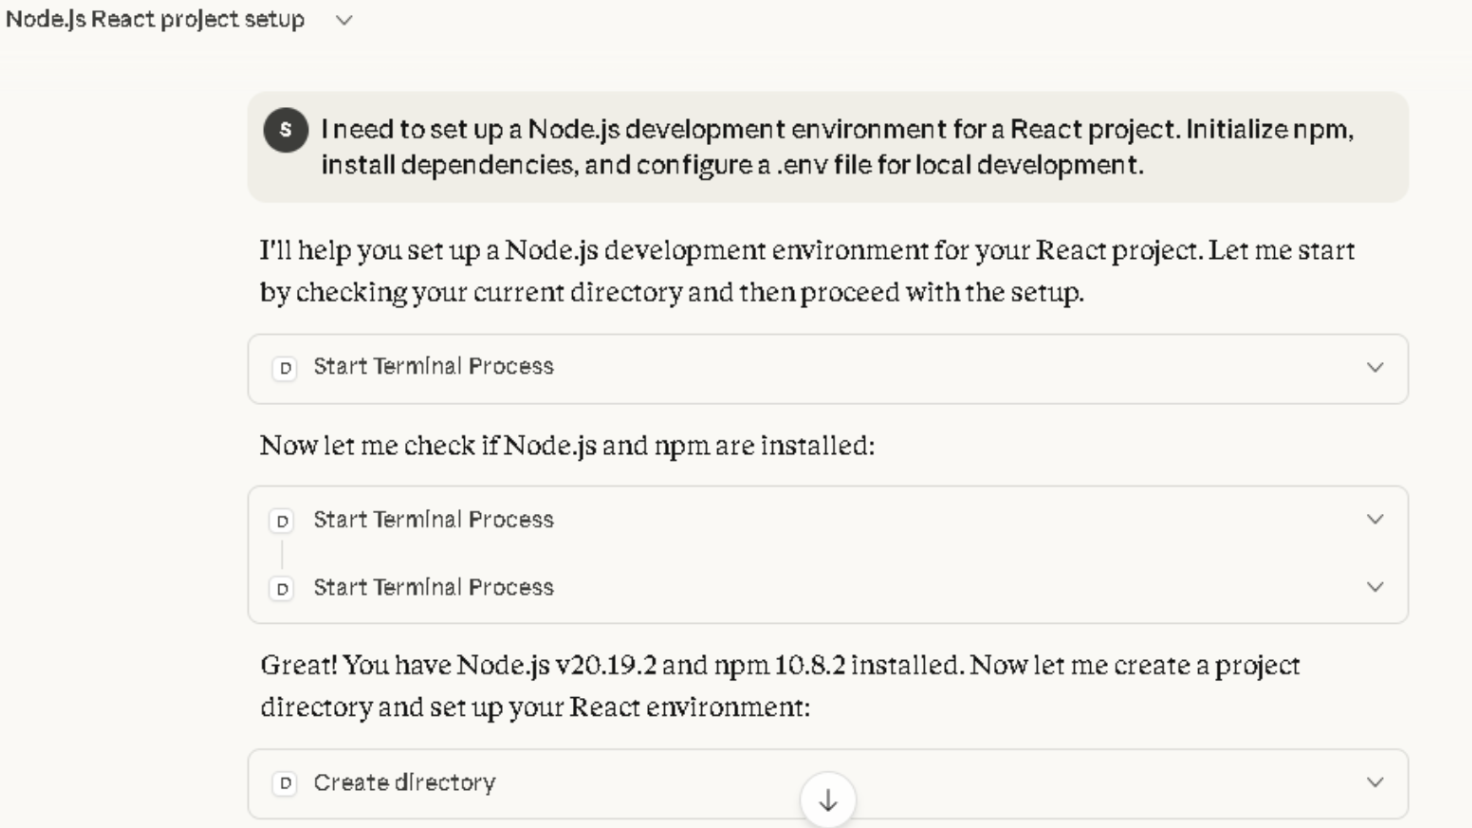
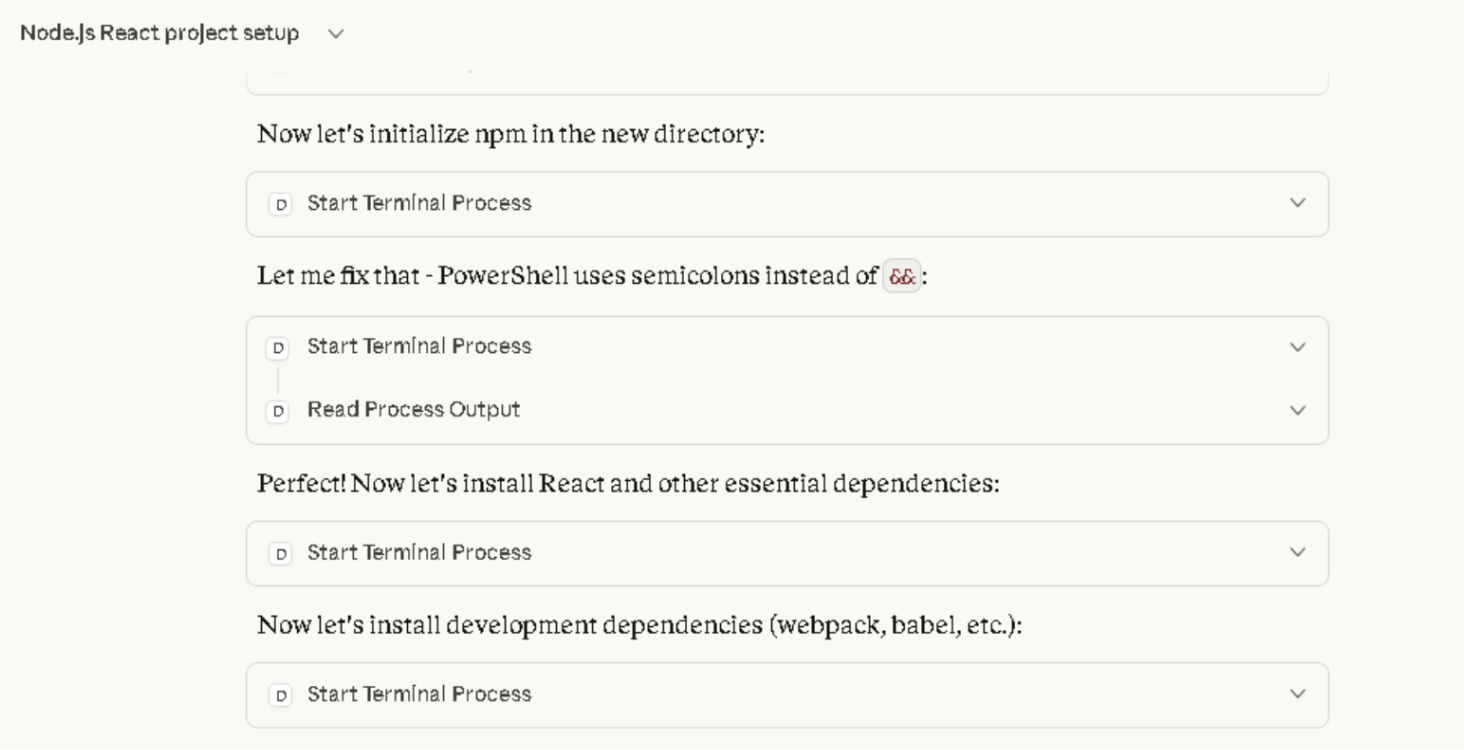
Now, when I open my project directory, everything is installed there automatically:
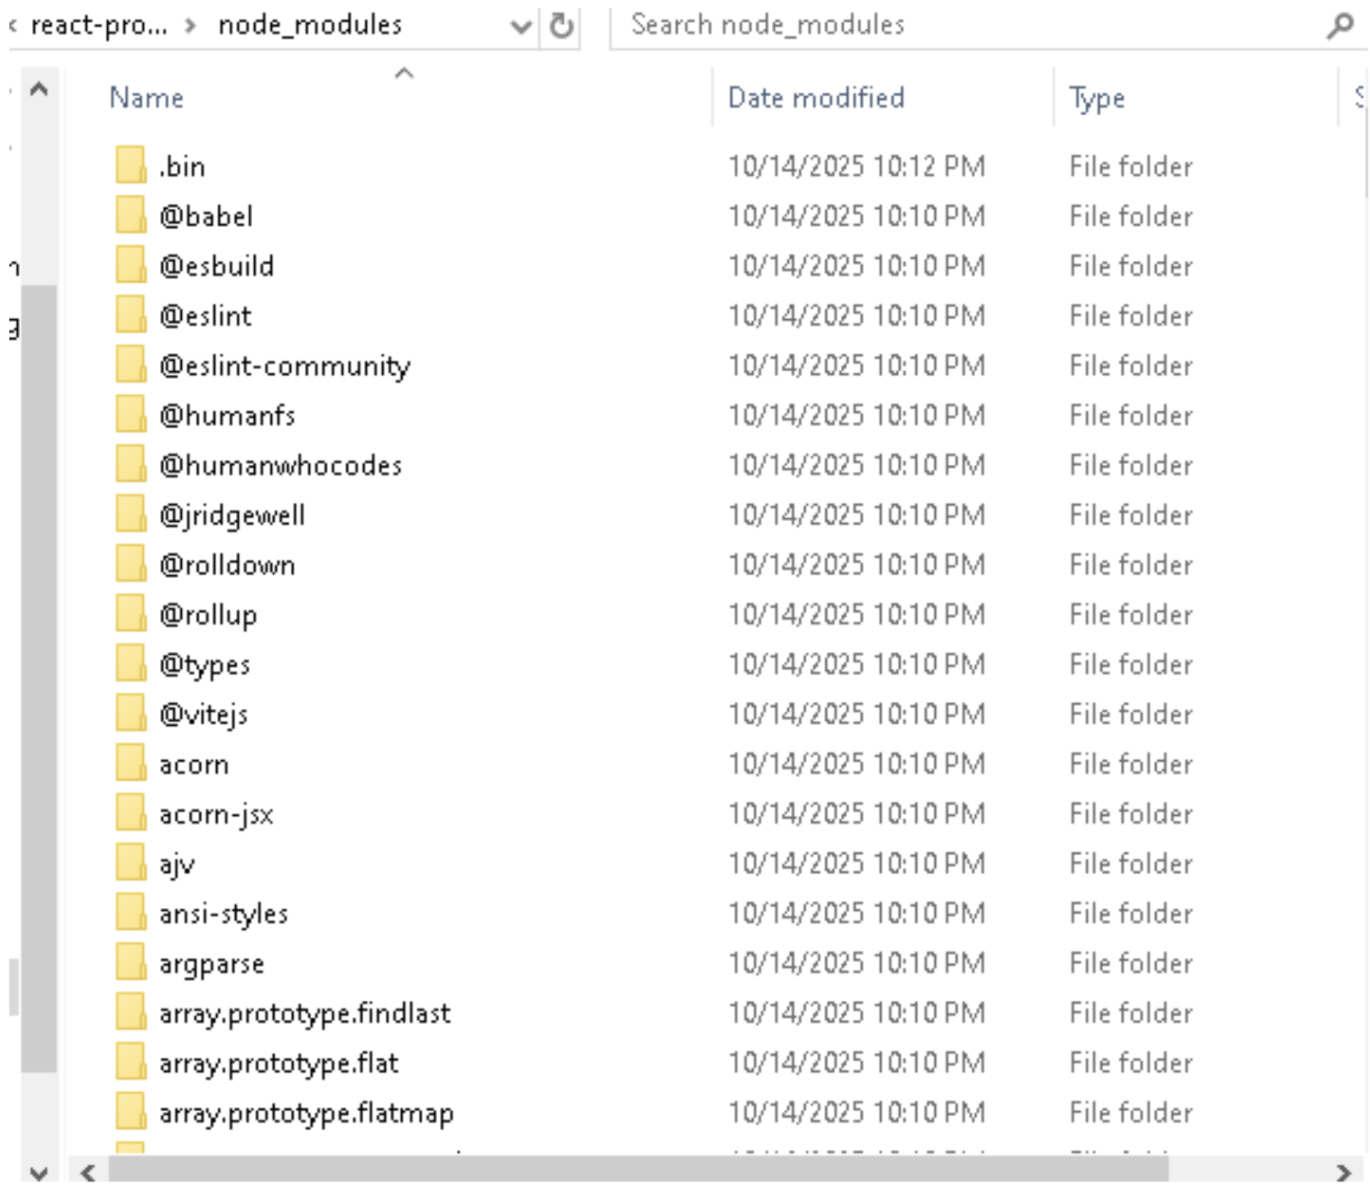
To set up this project, Claude used various features or tools of Desktop Commander, such as:
- Creating a project directory
- Running terminal commands
- Installing packages
- Creating required folders
- Writing files like package.json
With Desktop Commander, I completely skipped the usual PostgreSQL version mismatch that we always face when switching between projects. Last week, instead of spending an hour Googling errors, Desktop Commander caught the error and had the right version installed in seconds.
Another thing that saves me tons of time is not having to remember terminal command syntax. Last week, I was setting up a new Express API with TypeScript, PostgreSQL, and Redis. Normally, I'd be jumping between tabs looking up the right npm install flags, PostgreSQL init commands, and Redis configuration syntax. Instead, I just told Claude: "Set up an Express TypeScript project with PostgreSQL and Redis for local development," and it automatically executed all the required commands through Desktop Commander.
Desktop Commander also makes working with Docker simpler and easier. For Docker workflows, you can ask Claude to run docker build, docker compose up, mount volumes, and more through Desktop Commander rather than manually typing each command.
Conclusion
Setting up a local development environment is tricky. It used to eat up hours of my time. I'd hit a PostgreSQL version conflict and spend the next few hours Googling error messages. I'd carefully type 20+ terminal commands, only to realize I made a typo in command 12 and had to start over. And the classic "works on my machine" scenario? I’ve dealt with that as well. Fortunately, with Desktop Commander, an MCP server that lets you set up your development environment using natural language, I was able to solve these issues.
I simply integrate the MCP server with Claude Desktop and provide it with a prompt in natural language. Claude then automatically creates the project directory, other required folders, executes the terminal commands, and installs the necessary packages and dependencies using Desktop Commander. With Desktop Commander, I don’t have to remember and type so many terminal commands or worry about version mismatch.
Frequently Asked Questions
What is the easiest way to set up a local development environment? ▾
Can AI set up my development environment automatically? ▾
What should a local development environment include? ▾
How do I set up a dev environment that works on both Mac and Windows? ▾
What is the best tool for automating development environment setup? ▾
Install Desktop Commander MCP
Connect Claude to your local files and terminal. One-click install for Claude Desktop.